
To install laminate flooring, begin by removing existing flooring and ensuring a level, clean, and dry subfloor. Check moisture levels, address imperfections, and install a foam underlayment. Acclimate planks for 48 hours, then start laying them along the longest wall, using spacers to maintain an expansion gap. Stagger seams and trim planks to fit. Complete by adding baseboards and molding. A thorough cleaning finalizes the process, setting the stage for further steps to perfect the installation.
Key Takeaways
- Remove existing flooring and ensure a clean, level subfloor for optimal laminate installation.
- Acclimate laminate planks for 48 hours in the installation area to stabilize.
- Install underlayment to provide a smooth surface and moisture barrier beneath the laminate.
- Begin installation with the first row along the longest wall, maintaining expansion gaps.
- Finish with baseboards and transition moldings to cover gaps and achieve a polished look.
How do you prepare the subfloor for laminate installation?
To prepare the subfloor for laminate installation, begin by removing any existing flooring materials, ensuring that all remnants are cleared.
Next, inspect the subfloor for levelness and cleanliness, using a leveling compound or sandpaper to address any uneven areas.
Finally, assess and rectify any moisture issues or imperfections, employing a moisture barrier or patching compounds as necessary to create a suitable foundation.
Steps to Remove Existing Flooring
Before install the flooring, it is essential to properly prepare the subfloor by removing any existing flooring.
Begin by gathering necessary tools and materials, such as pry bars, hammers, and utility knives. Carefully remove baseboards and any tack strips around the perimeter. For glued-down surfaces, utilize adhesive removers to detach the flooring.
Confirm that all remnants are cleared to achieve a level subfloor. Attention should be paid to temperature and humidity conditions, as they can affect the subfloor’s readiness for laminate flooring installation.
If assistance is required, consult with flooring contractors to confirm thorough removal. Properly preparing the subfloor not only facilitates a smooth installation process but also enhances the longevity and appearance of the laminate flooring.
Ensuring a Level and Clean Subfloor
Achieving a level and clean subfloor is essential for the successful installation of laminate flooring. To prepare the subfloor, begin by removing the existing flooring.
Inspect the subfloor for any uneven areas and use a leveling compound to guarantee a uniform surface. A level subfloor prevents future issues with the laminate floor.
Clean the subfloor thoroughly to remove dust and debris. Before proceeding, allow the laminate flooring to acclimate in the room for at least 48 hours. This helps the material adjust to the room’s temperature and humidity.
Ascertain an expansion gap of 1/4-inch around the room’s perimeter. Finally, the underlayment will be installed according to the manufacturer’s instructions, laying a solid foundation for the laminate floor installation.
Addressing Subfloor Moisture and Imperfections
Addressing subfloor moisture and imperfections is a crucial step in preparing the subfloor for laminate installation.
Begin by inspecting the subfloor for moisture using a moisture meter. Verify readings are below specified levels before proceeding.
Uneven spots or imperfections should be sanded or filled with a leveling compound to create a smooth surface. Allow the subfloor to acclimate to room conditions for 48 hours.
Next, install a foam underlayment, laying it across the entire subfloor. The underlayment acts as a moisture barrier and provides cushioning.
Confirm it extends to the perimeter of the room, trimming as needed. Overlap seams by a few inches and use adhesive tape to secure edges.
This preparation guarantees a successful laminate flooring installation, minimizing future issues.
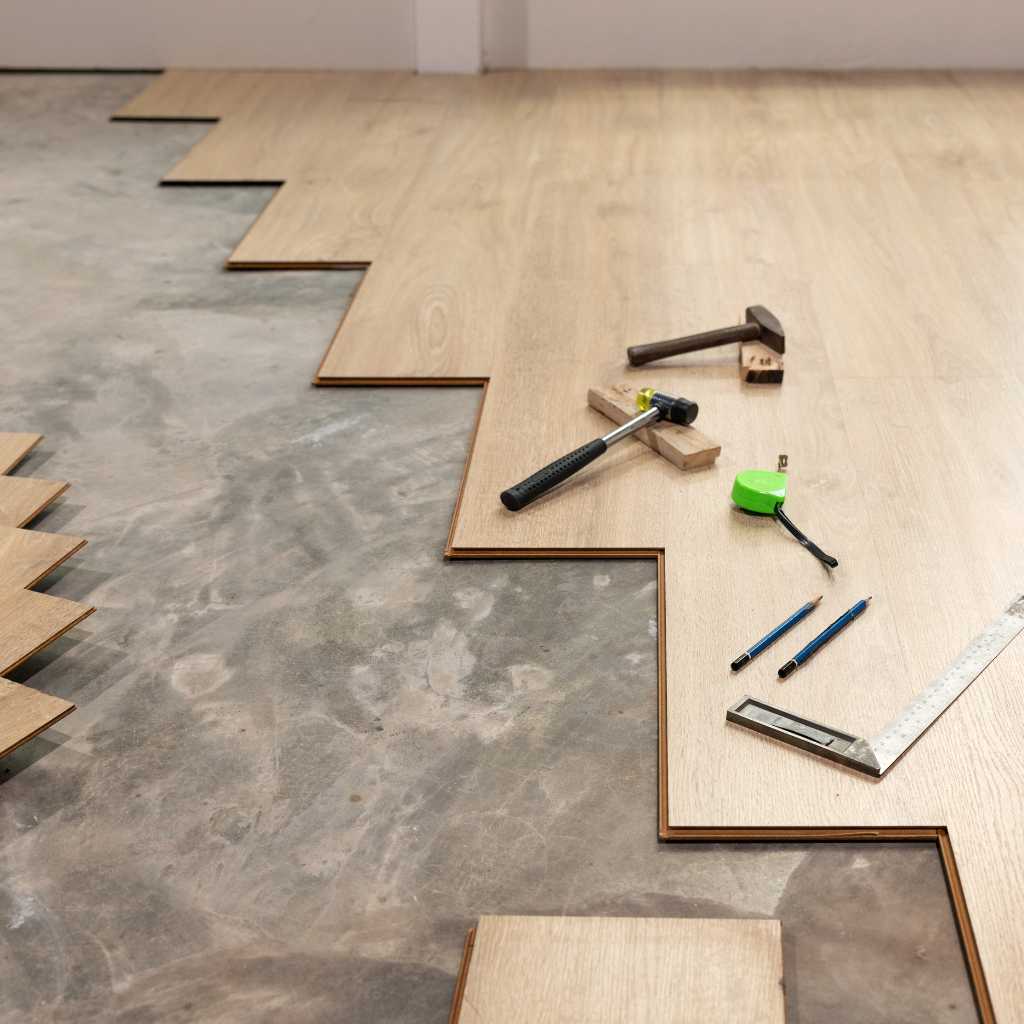
What Tools and Materials Are Needed for Installation of Laminate?
To successfully install laminate flooring, one must gather essential tools such as a tape measure, saw, and tapping block, alongside materials like underlayment and spacers.
Preparing the workspace is vital, as well as ensuring the subfloor is clean, dry, and level to support the new flooring.
Proper organization of these tools and materials facilitates an efficient installation process.
Essential Tools for Install Laminate Flooring
A successful laminate flooring installation requires a strategic assembly of essential tools and materials to guarantee efficiency and precision. This involves preparing to lay the underlayment and cutting precise measurements for a seamless finish.
The tools needed for laminate installation include:
- Cutting Tools: For accurate cuts, use a circular saw, flooring cutter, or jigsaw. These tools guarantee pieces fit perfectly.
- Installation Aids: A tapping block and pull bar help secure planks without damaging them. These are vital for tight, gap-free joints.
- Spacing Tools: Spacers maintain consistent gaps between planks and walls, allowing for natural expansion.
Having the right equipment not only simplifies the installation process but also enhances the durability and appearance of laminate flooring.
Preparing Your Space: Subfloor Requirements
While possessing the proper tools streamlines the process of laying the laminate flooring, preparing the subfloor is equally important for a successful installation. Begin by evaluating subfloor requirements to guarantee it is clean, dry, and level. Address any imperfections to prevent issues during the flooring project. Install underlayment as it provides a smooth base. Use underlayment tape to secure joints effectively. Before laying the floor, measure and mark where to install the first row. Begin at the corner of the room, aligning planks carefully. The following table outlines the materials needed to install:
| Material | Purpose | Notes |
|---|---|---|
| Underlayment Tape | Seal underlayment seams | Use at joints |
| Level | Check subfloor evenness | Guarantee floor is level |
| Damp Cloth | Clean subfloor | Remove dust and debris |
How do you install the underlayment for laminate flooring?
Installing the underlayment for laminate flooring begins with selecting the appropriate type based on the subfloor material, whether it be concrete or plywood.
The process entails unrolling the underlayment and carefully aligning it without overlaps, ensuring each piece fits snugly against the next.
Proper installation is essential as it provides a moisture barrier, sound reduction, and a level surface for the laminate planks.
Types of Underlayment for Different Floors
Selecting the appropriate underlayment is fundamental for guaranteeing the durability and comfort of laminate flooring. Different floors require specific underlayment types, considering factors such as pre-attached underlayment, vinyl flooring, and real wood floors. Here is a breakdown:
- Pre-attached underlayment: Ideal for laminate with pre-attached layers. It simplifies installation by eliminating the need for additional underlayment.
- Vinyl flooring underlayment: Provides moisture resistance and soundproofing, which are essential where water exposure is a concern.
- Real wood underlayment: Allows for natural expansion and contraction, which is important for environments where temperature and humidity fluctuate.
Prior to installation, verify the underlayment is acclimated to the room’s conditions.
Lay it along the perimeter of the room, allowing it to fit around obstacles like baseboards and guaranteeing a snug installation of laminate flooring.
Step-by-Step Guide to Lay the Underlayment
To begin the process of installing underlayment for laminate flooring, one should first gather all necessary materials and tools, such as a utility knife, measuring tape, and adhesive tape.
Start by allowing the flooring to acclimate for 48 hours in the room. Next, roll out the underlayment across the subfloor, guaranteeing there is a slight gap around the edges to accommodate expansion.
Install begin the first row of underlayment, aligning it parallel to the longest wall, and secure it with adhesive tape around the perimeter.
When laying the laminate flooring, use a tapping block to guarantee tight seams. Carefully cut around obstacles like door frames or vents with a utility knife.
This prepares a smooth foundation for the laminate flooring installation.
Importance of Correct Underlayment Installation
Proper underlayment installation is essential for the longevity and performance of laminate flooring. It provides a smooth surface for the new floor and acts as a moisture barrier.
To install underlayment correctly, follow these steps:
- Lay the First Row: Unroll the underlayment across the room’s width, ensuring it fits snugly without overlapping. Trim as needed and leave a small gap around the walls to allow for expansion.
- Fit the Next Row: Align the edges of the underlayment with the previous row, avoiding any gaps that might compromise the floor’s stability.
- Install Securely: Tape the seams to prevent shifting during laminate flooring installation, ensuring a seamless foundation.
What Are the Initial Steps in Laying Laminate Flooring?
To begin laying laminate flooring, it is essential first to acclimate the planks by leaving them in the room where they will be installed for at least 48 hours.
Once acclimated, start the installation by laying the first row of planks along the longest wall, ensuring that the groove side faces the wall.
Use spacers between the planks and the wall to maintain the recommended expansion gap, which allows for natural expansion and contraction of the flooring.
How to Acclimate Laminate Planks Before Installation
Before commencing the installation of laminate flooring, it is vital to acclimate the laminate planks to their new environment to prevent potential issues such as warping or gaps.
The following steps are critical:
- Acclimate for at least 48 hours: Place the laminate planks in the intended installation room, ensuring they remain at room temperature and consistent humidity levels. This period allows the laminate flooring to expand or contract based on climate conditions.
- Open packaging: Remove the planks from their packaging and open boxes to facilitate airflow around the planks.
- Stack properly: Stack the laminate planks horizontally, ensuring spacers are used to allow for adequate circulation, helping them adjust to the room’s climate conditions efficiently.
Following these steps guarantees a stable and durable installation.
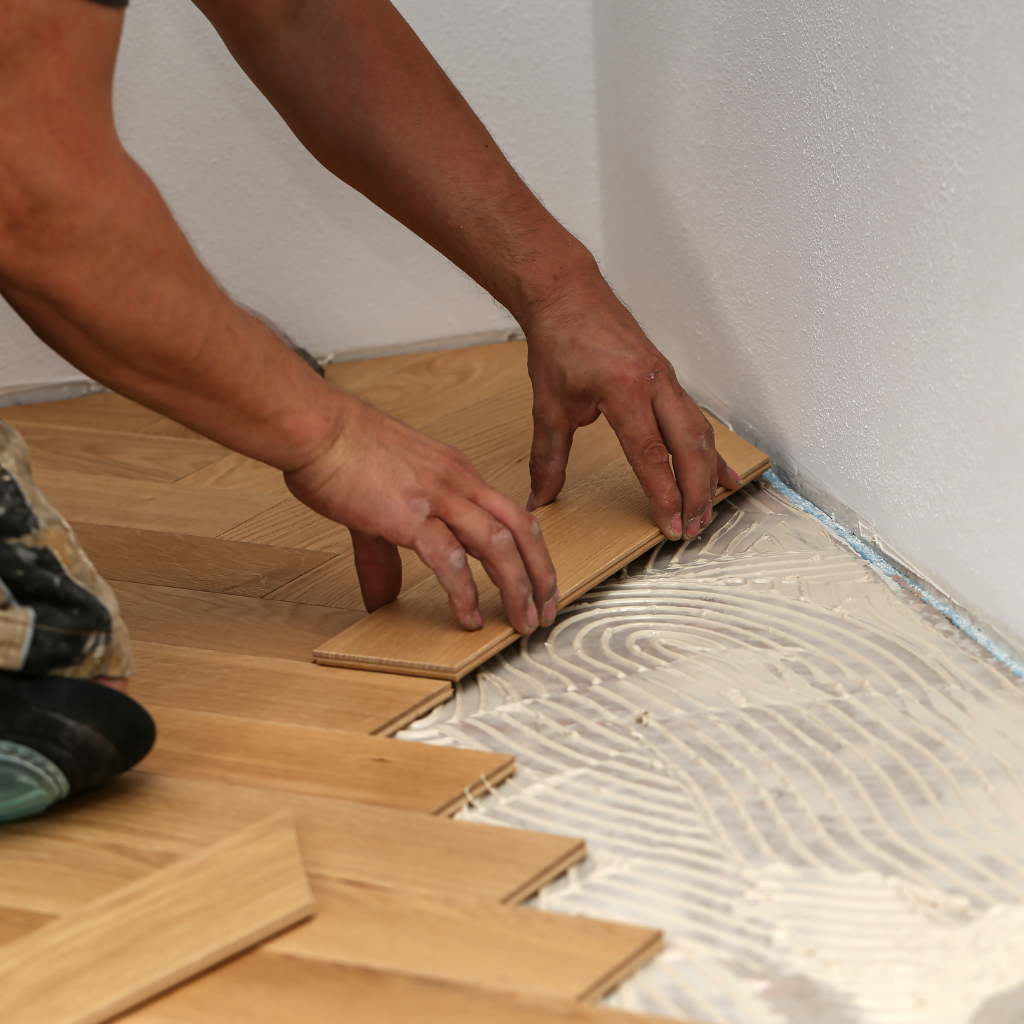
How to Install the First Row of Laminate Planks
Laying planks of the first row of laminate sets the foundation for a precise and successful installation.
Begin by measuring the width of the room to determine how the first two rows will be arranged. Start laying the first row of flooring along the longest wall, ensuring a gap around the perimeter to allow for expansion.
Position the first plank at an angle, engaging its tongue into the groove of the next board. Continue this process, ensuring each connection is secure—trim boards to fit around any obstacles or walls for a seamless finish.
It’s essential to maintain alignment and consistency, as these initial steps in learn how to install laminate flooring impact the entire installation.
Using Spacers for Proper Expansion Gap
After securing the first row of laminate planks, the next step involves guaranteeing proper expansion gaps using spacers. This critical step prevents future buckling and allows the laminate flooring will expand and contract naturally.
Here’s how to proceed:
- Placement of Spacers: Insert spacers between the walls and the edge of the laminate plank. The expansion gap should match the width of the planks. Guarantee uniform spacing along the entire perimeter, including doorways.
- Installing the Second Row: Align the second row with the first, maintaining the expansion gap. Use a pull bar to snugly fit each plank together, guaranteeing no gaps between them.
- Final Adjustments: As you approach the last row, trim planks as needed to accommodate any remaining space while preserving the expansion gap.
How do you continue laying laminate flooring for a seamless finish?
To achieve a seamless finish when continuing to lay laminate flooring, it is essential to properly align and interlock the second row and subsequent rows with the first.
A tapping block and pull bar are key tools for ensuring tight seams and a snug fit between two planks.
Special attention should be given to doorways and other obstacles by carefully measuring and cutting planks to accommodate these areas without disrupting the pattern.
Techniques for Adding the Second Row and Beyond
Once the initial row is securely in place, guaranteeing a smooth shift to the second row is essential for a seamless laminate flooring installation.
When ready to install laminate flooring beyond the first row, follow these precise steps:
- Stagger Seams: When applying the next row of planks, offset seams by at least 12 inches from the previous row to enhance structural stability and visual appeal.
- Join the Planks: Insert the tongue of the new plank into the groove of the installed row, angling slightly to guarantee a snug fit. Continue this process for each additional plank.
- Cut the Flooring: Use a saw to cut the final plank of each row to fit, ensuring the end plank aligns with the room’s boundary.
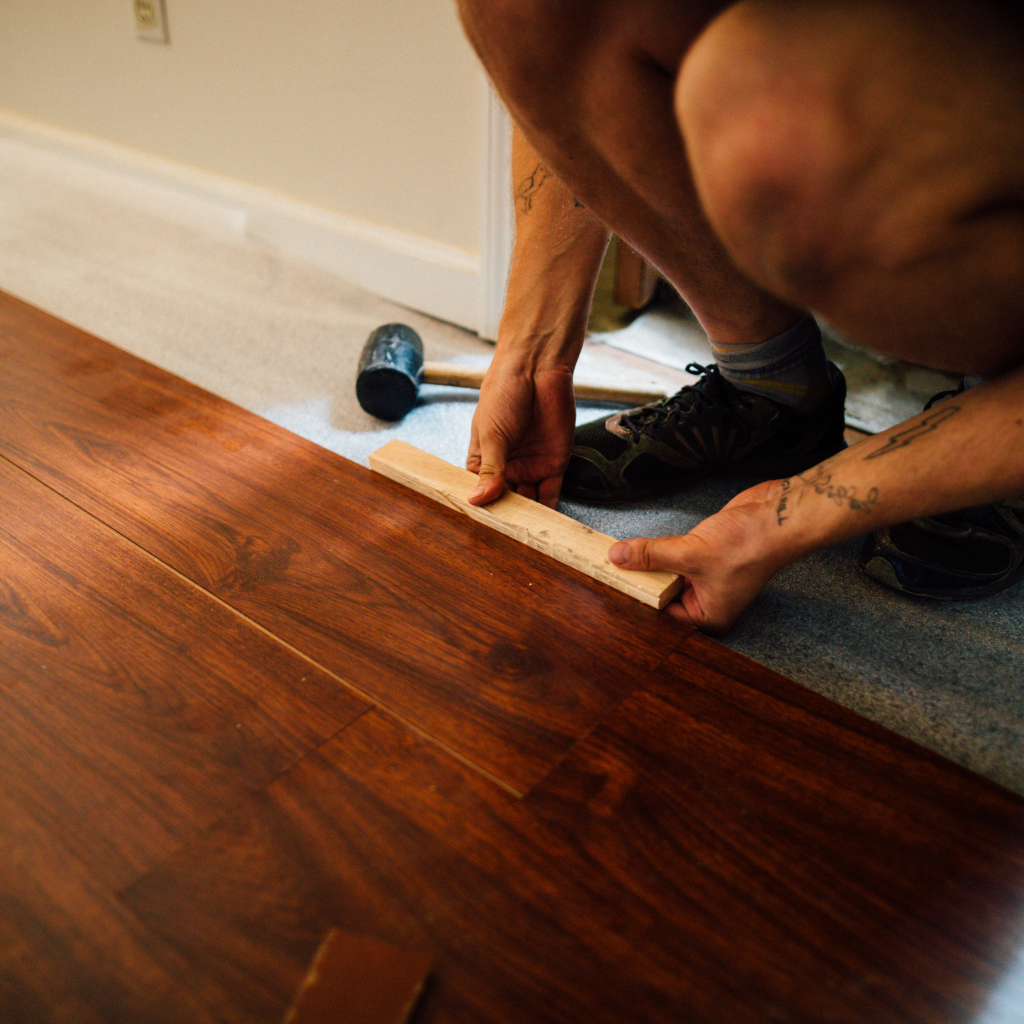
Using a Tapping Block and Pull Bar for Tight Fit
Securing a flawless fit between laminate planks demands precision, and utilizing a tapping block and pull bar is necessary for this process.
When determining how to install laminate flooring, a tapping block guarantees each plank is snugly positioned without damaging edges. To apply laminate flooring correctly, align the tapping block against the plank’s edge and gently tap with a mallet to slide planks into place.
It’s essential to repeat this step for each plank to maintain uniformity. A pull bar is critical for fitting planks near walls; position it at the board’s end, tapping gently to close gaps.
If you need to remove a plank, leverage the pull bar carefully to avoid damaging adjacent pieces. This approach guarantees a seamless finish when you’re installing a laminate floor.
Handling Doorways and Other Obstacles
Achieving a seamless installation of laminate flooring extends beyond fitting individual planks and requires careful navigation around obstacles like doorways.
To tackle doorways and similar obstructions, follow these steps:
- Undercut Door Jambs: Use a jamb saw to trim door casings and jambs, allowing the laminate to slide underneath. Guarantee a tight fit without gaps.
- Measure and Cut Precisely: Measure the space accurately, accounting for any irregular shapes around the obstacle. Cut the laminate planks with a jigsaw, ensuring they align seamlessly.
- Install Transition Moldings: For rooms with different flooring types, use transition moldings at doorways. These provide a smooth connection and can accommodate any height differences.
These steps guarantee the laminate flooring extends uniformly through doorways and around obstacles, achieving a professional finish.
How do you complete the laminate installation with finishing touches?
To complete the laminate flooring installation, one should start by installing baseboard around and connector moldings to cover expansion gaps and provide a polished look.
Next, final checks will be conducted to guarantee all planks are securely in place and any necessary adjustments are made.
Finally, a thorough cleaning of the new floor is performed to remove any dust and debris, assuring a pristine finish.
Installing Baseboards and Transition Moldings
Proper installation of baseboards and threshold moldings is an essential step in completing the laminate flooring project with a polished look.
Begin by measuring the perimeter of the room to determine the length of baseboards required. Cut the baseboards using a miter saw to guarantee precise angles.
- Attach Baseboards: Position the baseboards against the wall, guaranteeing a snug fit without gaps. Secure them using finishing nails, spacing them every 16 inches.
- Install Connector Moldings: Measure doorways and areas where flooring changes type. Cut connector moldings to fit, then secure with screws or adhesive, depending on the subfloor.
- Seal Gaps: Use a flexible caulk to fill any gaps between the baseboards and walls, providing a seamless appearance.
Allow adequate drying time for all adhesives and caulks used.
Final Checks and Cleaning of Your New Floor
Although the installation process is nearly complete, conducting final checks guarantees a flawless finish for the laminate flooring.
First, verify all planks fit snugly, with no visible gaps or misaligned joints. Confirm that expansion gaps are maintained around the perimeter to allow for natural movement. Inspect connecting moldings and baseboards for secure attachment and seamless integration with the flooring edges. Pay attention to any uneven surfaces or raised edges, which may require additional adjustments.
Once structural integrity is confirmed, proceed to cleaning. Use a soft-bristle broom or vacuum with a hard floor attachment to remove debris and dust.
Finally, lightly dampen a microfiber mop with a laminate-safe cleaner to remove any remaining residue, confirming the surface is pristine and ready for use.
Conclusion
Upon completing the laminate flooring installation, the final result is a meticulously arranged and durable surface. The process demands careful preparation of the subfloor, precise selection and use of tools, and strategic placement of underlayment. By following a methodical approach to laying each plank, ensuring snug and seamless connections, the floor achieves a flawless appearance. Finishing touches, such as trimming excess material and installing baseboards, solidify the professional quality of the installation.